The installation and use of USB capture card mainly includes the following steps:
Installation steps
1. Hardware connection:
Connect the USB interface of the USB capture card to the USB interface of the computer through a USB cable (or directly through the USB interface). Usually, this process does not require shutdown and can be plugged and unplugged with power on.
After connection, the computer may automatically recognize and pop up the installation wizard for finding new hardware.
2. Driver installation:
If the computer does not automatically install the driver, or the installation location of the driver needs to be specified, it needs to be installed manually.
Open the driver folder (which may be a CD, USB flash drive, or downloaded file), double-click the driver installer (which may be an EXE file or INF file) to install it.
According to the instructions of the installation wizard, select the installation location of the driver and complete the installation.
3. Check the device manager:
After the installation is complete, you can use the device manager to check whether the USB capture card has been successfully installed. In the device manager, you can usually find the newly installed USB capture card device under categories such as "Sound, video and game controllers" or "Image processor".
If there are exclamation marks or question marks in the device manager, it means that there may be problems with the driver installation and the driver needs to be reinstalled or updated.
Usage steps
1. Install the software:
Install the corresponding acquisition software according to the model and function of the USB acquisition card. The software may be included with the acquisition card or downloaded from the official website.
When installing the software, follow the instructions of the installation wizard to complete the software installation.
2. Run the software:
After installing the software, find the software on the desktop or program menu and double-click to run it.
In the software, you usually need to select the installed hardware device and set related parameters, such as sampling frequency, number of channels, resolution, etc.
3. Perform data acquisition:
In the software, select the "Data Acquisition" function and set parameters as needed.
Click the "Start" button to start data acquisition. The collected data can be processed and stored as needed.
Precautions
When installing and using the USB acquisition card, ensure that the USB interface of the computer is in good contact and the computer system is stable.
If you encounter problems during installation or use, you can refer to the manual of the capture card or contact the manufacturer for technical support.
Different models of USB capture cards may have slight differences in installation and use, so it is best to follow the specific manual or instructions.
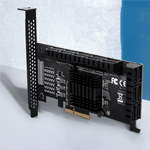
PCIE capture card installation and use
For the installation and use of PCIE capture cards, you can follow the steps below:
Installation steps
1. Preparation:
Turn off the computer and disconnect the power to ensure safety during operation.
Check the model and specifications of the PCIE capture card to ensure that it is compatible with the PCIE slot of the computer motherboard.
2. Open the chassis:
Open the computer chassis and find an empty PCIE slot.
3. Install the capture card:
Carefully insert the PCIE capture card into the PCIE slot, ensuring that the gold fingers of the slot and the capture card are aligned.
Use screws or other fixings to fix the capture card to the chassis to ensure its stability.
4. Connect the power supply and other cables (if necessary):
If the capture card requires external power, make sure to connect the correct power cord and cables.
5. Close the chassis and connect the power:
Close the chassis cover and reconnect the computer power.
6. Install the driver:
After starting the computer, the system will detect the new hardware and may pop up the installation wizard.
If it is not installed automatically, you need to download the driver from the CD attached to the acquisition card, the official website, or other channels.
Double-click the driver installation package and follow the instructions of the installation wizard to complete the driver installation.
Steps
1. Install the software:
Install the corresponding software or application according to the model and function of the acquisition card.
These software are usually used to configure acquisition card parameters, collect data, and process data.
2. Start the software:
After installing the software, find the software on the desktop or program menu and double-click to start.
3. Configure acquisition parameters:
In the software, configure the acquisition parameters as needed, such as sampling rate, resolution, number of channels, etc.
4. Start acquisition:
Click "Start" or similar buttons in the software to start data acquisition.
As needed, the collected data can be saved to a specified file or processed in real time.
5. Monitoring and adjustment:
During the acquisition process, the acquisition status and data can be monitored through the software interface.
Adjust the acquisition parameters or perform other operations as needed.
Precautions
When installing and using the PCIE acquisition card, make sure that the computer power is turned off and the power is disconnected to avoid electric shock or other unexpected situations.
When installing the driver, select the driver version that matches the acquisition card model and operating system.
When using the acquisition card, comply with relevant operating specifications and safety requirements to ensure the accuracy and security of the data.
Thunderbolt acquisition card installation and use
Regarding the installation and use of the Thunderbolt acquisition card, you can follow the following steps:
Installation steps
1. Preparation:
Make sure your computer has a Thunderbolt interface. The Thunderbolt interface is usually located on the side or back of the computer and has a unique lightning logo.
Check the model and specifications of the Thunderbolt acquisition card to ensure that it is compatible with the computer's Thunderbolt interface.
2. Connect the capture card:
Connect the Thunderbolt capture card to the Thunderbolt port of the computer via the Thunderbolt cable. Make sure the connection is firm and the ports are aligned and not loose.
3. Install the driver:
Most Thunderbolt capture cards will automatically install the corresponding driver after being connected to the computer. If it is not installed automatically, you need to download the driver from the CD that comes with the capture card, the official website, or other channels.
Double-click the driver installation package and follow the instructions of the installation wizard to complete the driver installation. During the installation process, you may need to select the installation path, agree to the license agreement, etc.
4. Verify the installation:
After the installation is complete, you can verify whether the Thunderbolt capture card has been successfully installed through the device manager. In the device manager, you can usually find the newly installed Thunderbolt capture card device under categories such as "Sound, video and game controllers" or "Image processor".
Usage steps
1. Install the software:
Install the corresponding software or application according to the model and function of the Thunderbolt capture card. These software are usually used to configure acquisition card parameters, collect data, and process data.
2. Start the software:
After installing the software, find the software on the desktop or in the program menu and double-click to start it.
3. Configure acquisition parameters:
In the software, configure acquisition parameters such as sampling rate, resolution, number of channels, etc. as needed. Make sure these parameters match your needs.
4. Start acquisition:
Click "Start" or similar buttons in the software to start data acquisition. During the acquisition process, you can monitor the acquisition status and data through the software interface.
5. Data processing and saving:
As needed, you can process the collected data in real time or save it to a specified file. Make sure to comply with relevant operating specifications and safety requirements when processing and saving data.
Precautions
When installing and using the Thunderbolt acquisition card, please ensure that the computer power supply is stable and follow relevant operating specifications and safety requirements.
If you encounter any problems, such as driver installation failure, device unrecognition, etc., please refer to the acquisition card manual or contact the manufacturer for technical support.
The Thunderbolt interface has high-speed transmission and powerful expansion capabilities, but you also need to pay attention to the compatibility and stability of the interface. When purchasing a capture card, be sure to confirm that it is compatible with your computer interface.